Week 2: Build Your Stance
The complete pre-shot setup, taught in order — the routine every later week's stroke depends on. "A good shot starts before you bend down."
1 March 2027
Learning objectives
- Stand behind the cue ball and read the shot line before entering the stance.
- Set the feet and cueing arm in line with the shot before lowering.
- Use a relaxed grip and a stable, guiding bridge.
- Lower into a stable stance with the head and chin aligned to the cue.
- Repeat the full setup sequence, in order, on demand.
- Learn
This week is entirely about the pre-shot setup: how to stand, find the line, grip the cue, and settle into a stable stance and bridge before ever committing to a stroke. Each part of the setup is explained on its own below, in the order it happens.
- See
A numbered sequence walks through the setup from standing to warm-up strokes, so the order is as clear as the individual steps.
- Think
Examples of poor setup are shown so you can name what's wrong — entering the stance before finding the line, a tight grip, an unstable bridge, a cueing arm outside the shot line, or the body moving during delivery.
- Play
This week is mainly setup practice. Students repeatedly enter and leave the stance without worrying heavily about potting percentage.
- Table check
Tutor or self-check: can the student repeat the setup in the correct sequence, in order, without skipping a step?
The setup sequence#
- Observe from behind the cue ball. Before lowering into the stance, stand behind the cue ball and read the shot line: cue ball → object ball → potting point → pocket. Identify the intended shot line while still standing.
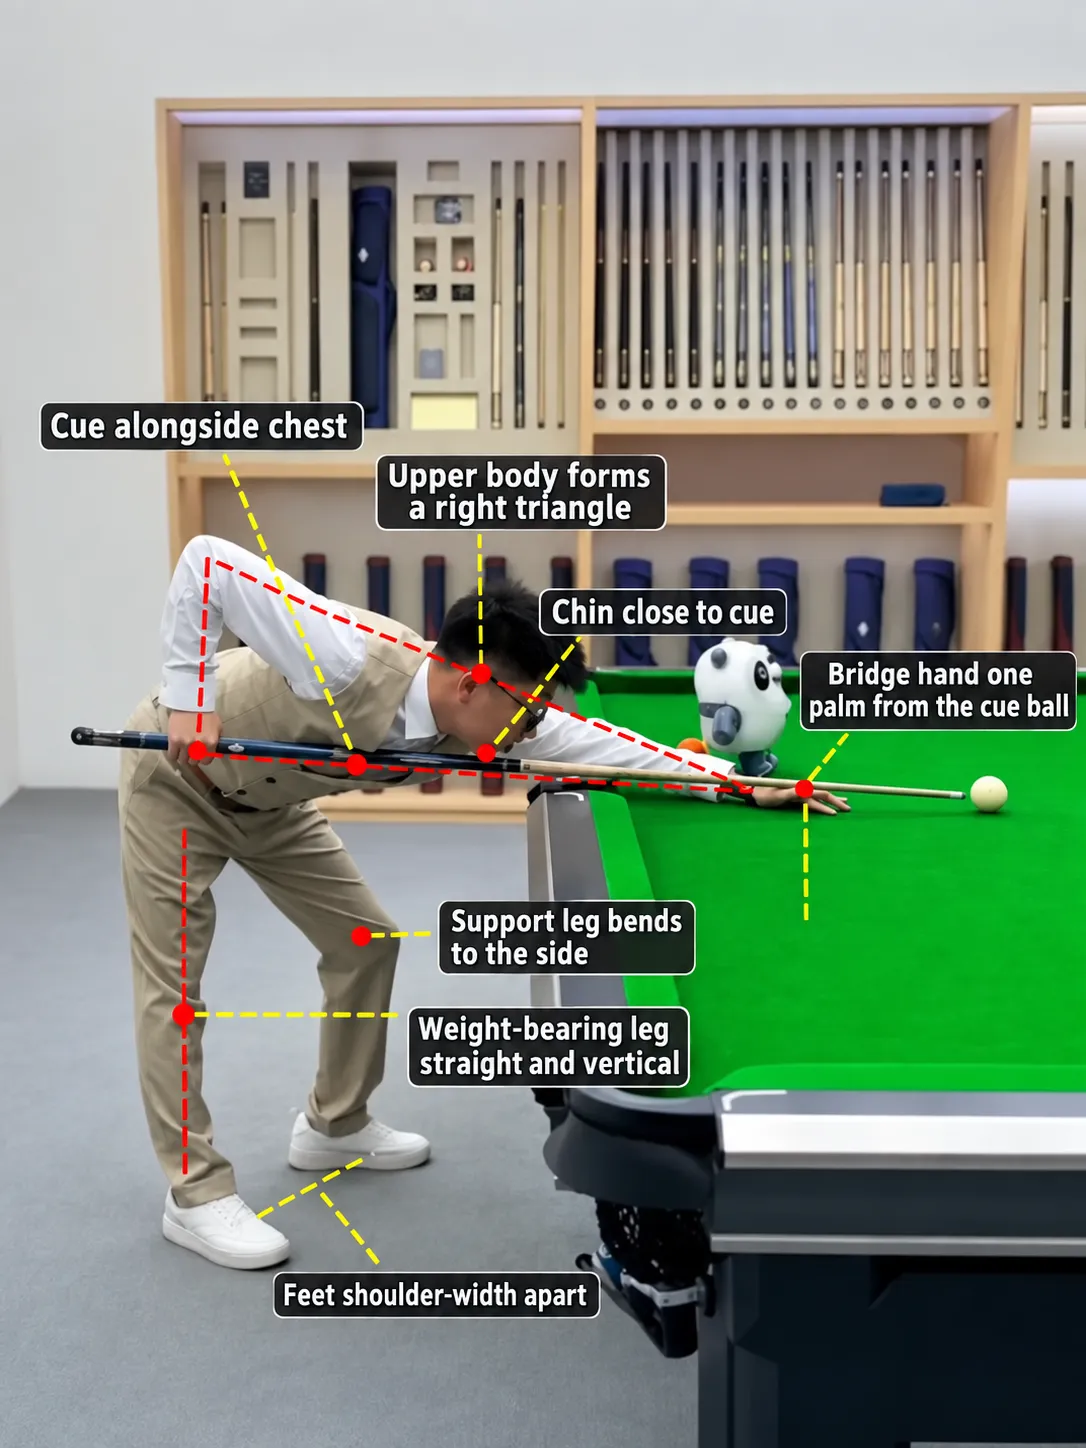
- Enter the shot line. For a right-handed player, the right foot lands on or naturally aligned with the extension of the shot line, and the cueing arm follows that same line. Treat this as a repeatable alignment principle, not a rigid, universal body measurement.
- Grip. Relaxed grip, wrist relaxed, no squeezing — the cue should be able to move naturally through the hand.
- Cueing arm. In the address position, the upper arm stays relatively stable, the forearm hangs naturally, and the elbow/forearm geometry allows a pendulum-like cue action. Roughly 90 degrees at the elbow is a useful beginner reference. Don’t over-emphasise muscular force.
- Lower into the stance. As you lower, rotate the body slightly — for a right-handed player, the left shoulder is generally more forward and the right shoulder more rearward. Keep the stance stable and comfortable.
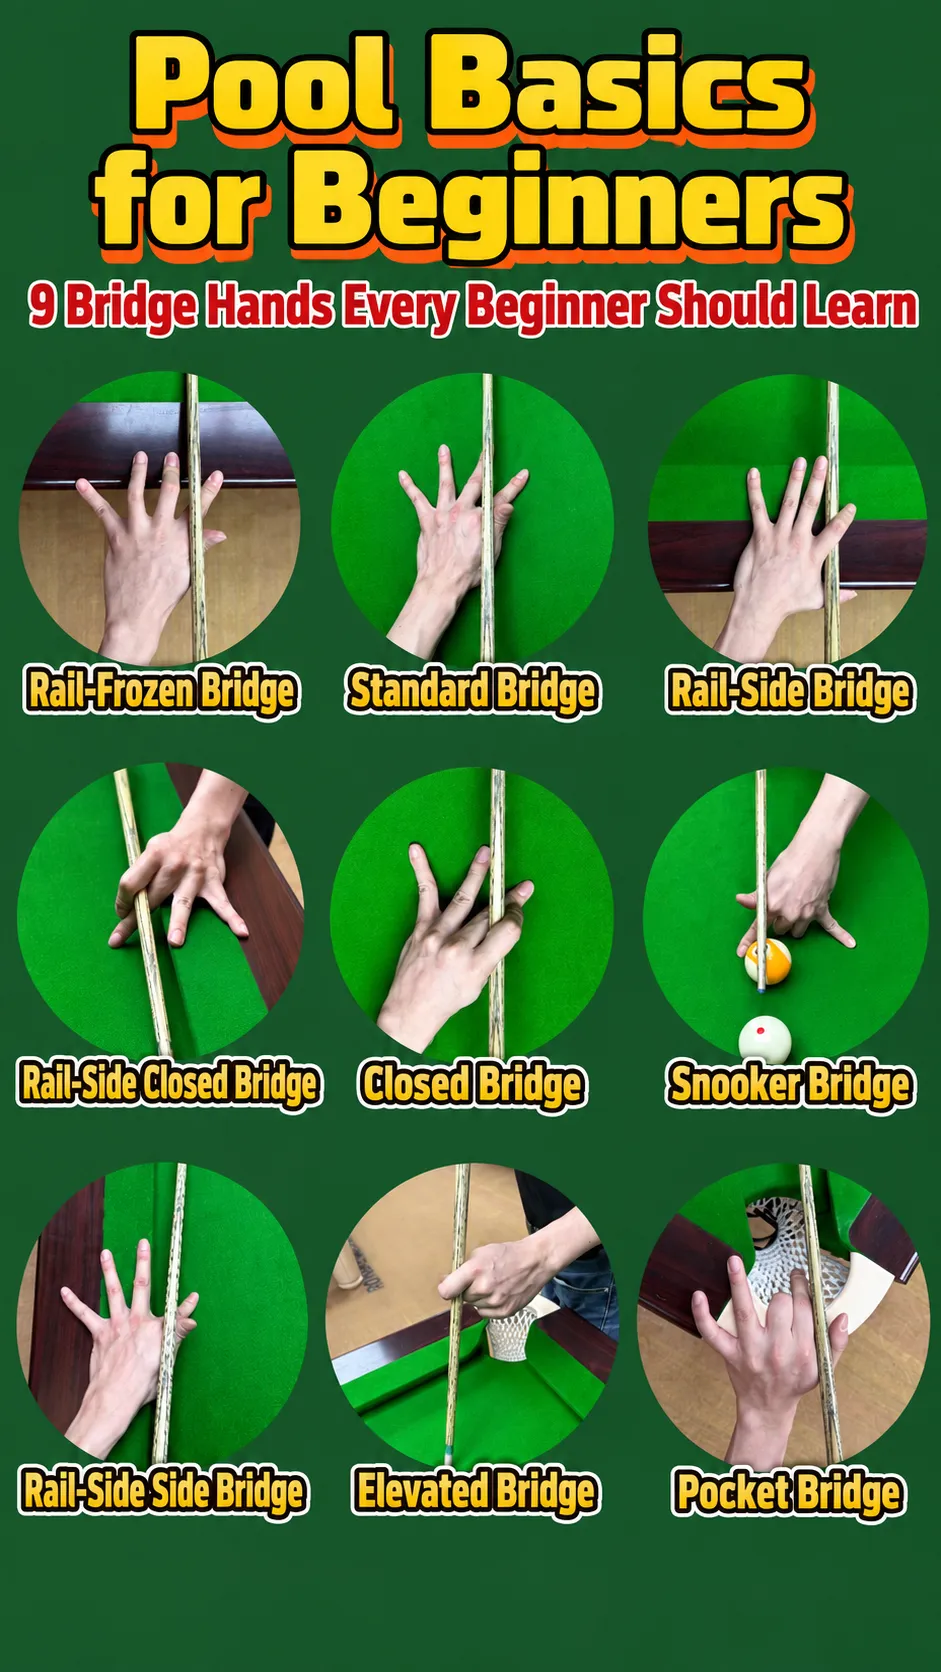
- Bridge. The front hand plants securely on the cloth, and the cue is supported between the thumb and index-finger structure. The bridge guides the cue; it doesn’t grip it.
- Head and chin position. Lower the head toward the cue, keep the cue close beneath the chin where comfortable, and align eyes, cue and the intended shot line. This reduces unnecessary vertical and sideways cue movement.
- Warm-up strokes. Before striking, make smooth practice strokes with a relaxed grip, checking that the cue continues along the intended line.
Reference photos#
A note for left-handed players#
The steps above use a right-handed player as the running example, purely to keep the description consistent. A left-handed player should mirror the left/right positioning described — for example, the left foot and left shoulder take the roles described above for the right foot and right shoulder. The sequence and its logic stay exactly the same.
Spot the error#
Each of these is a common setup mistake — see if you can spot which step above it breaks:
- Entering the stance before finding the line.
- A tight grip.
- An unstable bridge.
- A cueing arm outside the shot line.
- Moving the body during delivery.
Weekly quiz
Complete this week's graded quiz.