Week 9: Zone Positioning
Zone Positioning — a more forgiving alternative to an exact point: aim for a workable area, not a single spot.
19 April 2027
Learning objectives
- Identify a workable zone rather than a single target point.
- Understand why a zone is more forgiving than an exact point.
- Judge which side of the next object ball the cue ball needs to be on.
- Recognise the angle a zone needs to leave for the following shot.
- Choose zone positioning for less demanding position problems.
- Learn
Zone Positioning relaxes the target from a single point to a workable area. Instead of asking "can I stop exactly here?", it asks "can I finish anywhere in this region and still have a workable next shot?" This is more forgiving of small speed or angle errors, and it starts from a simple three-ball question: which side of the next object ball should the cue ball end up on?
- See
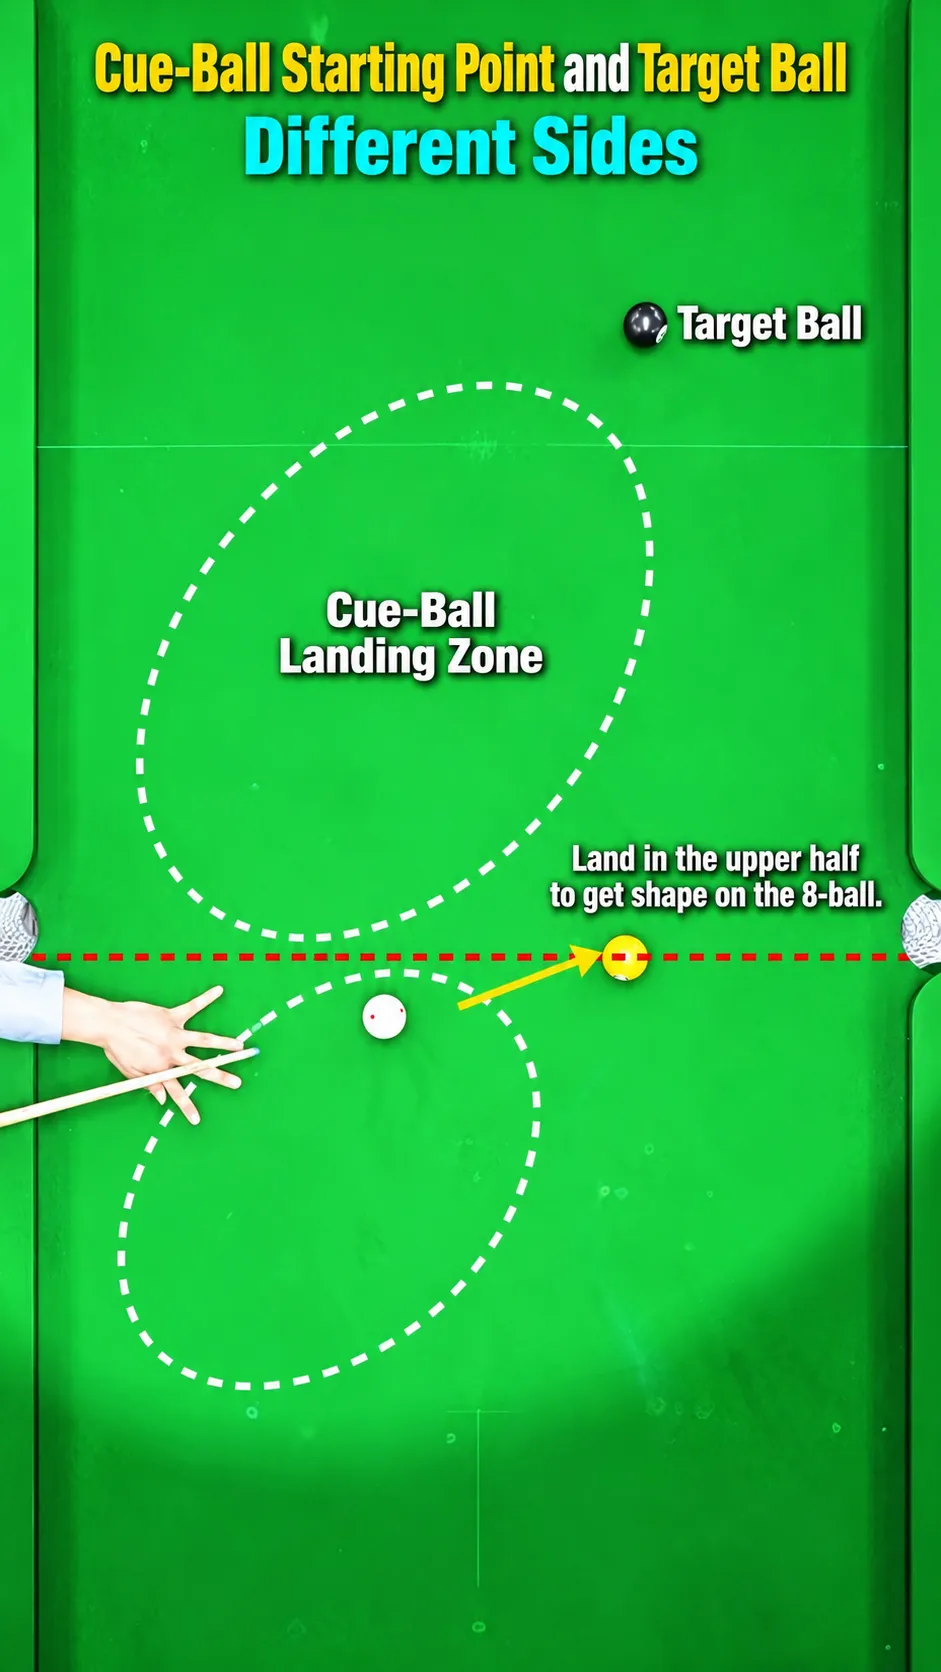
A diagram shows a target zone (rather than a single point) and the side of the next object ball the cue ball should finish on.
- Think
Given the cue ball, an object ball and a following ball, which side should the cue ball finish on to keep a workable angle for the next shot?
- Play
Practise landing inside a marked zone rather than on an exact spot, across a range of simple three-ball layouts.
- Table check
Pot the object ball and finish the cue ball inside an acceptable zone for the next shot, not on one exact point.
From a point to a zone#
Point positioning, from Week 8, asks for one exact finishing spot. Zone positioning relaxes that requirement: instead of one spot, define a workable area — any finishing position inside it should still leave a reasonable next shot.
Don’t play for a point. Play for an area.
Which side?#
Zone positioning starts from a simple three-ball question. Before playing the current ball, think one ball further ahead:
Ball 1 → position for Ball 2 → Ball 3
With the cue ball, the current object ball (Ball 2 in that chain) and the next object ball (Ball 3) in mind: which side of Ball 2 should the cue ball finish on, so the shot on Ball 3 has a workable angle? The side chosen on Ball 2 is what determines whether a useful angle toward Ball 3 exists at all — not just how close the cue ball finishes.
Why forgiving matters#
Because the target is an area rather than a point, small errors in speed or angle are less likely to ruin the next shot. This makes zone positioning a good default for less demanding position problems, and a useful safety net when perfect point positioning isn’t realistic.
You now have two tools: an exact point, and a workable zone. Both describe where the cue ball should finish. Week 10 asks a different question — not just where the cue ball ends up, but how it gets there, and what that path sets up further ahead.
Weekly quiz
Complete this week's graded quiz.