关于"天平挂盘"系统On the "Scale Tray" System
天平挂盘是本作最核心的养成系统,简单说就是把各种强化元件挂到托盘上, 通过左右配重去堆属性。网上常见的讨论方向大概分几种:毕业天平搭配 (堆到后期满配的终极形态)、极限毕业搭配(在前者基础上抠边际收益)、 10 托盘配法(托盘数量拉满之后怎么分配)、以及高收益搭配 (前期性价比最高的过渡方案)。这几个方向我都还在摸索,这里只写我自己现在用的思路, 不是标准答案。
The scale tray is the game's core progression system: hang various upgrade components onto a tray and balance the two sides to stack stats. Online discussion tends to split into a few camps: the "endgame build" (the fully maxed late-game form), the "extreme endgame build" (squeezing marginal gains beyond that), the "10-tray allocation" (how to split stats once every tray slot is unlocked), and the "high-value build" (the best-value transition setup for early game). I'm still figuring all of these out — what follows is just my current approach, not a definitive answer.
我目前的思路:先稳后爆
My Current Approach: Stabilize First, Then Go Aggressive
我自己现阶段是先把生存类的元件堆够(血量、减伤),再往上叠输出向的元件—— 毕竟卡关大多数时候是被秒,而不是打不动。等生存线稳定了,才会开始换成更激进的 高收益配法去博爆发。这个顺序不一定是最优解,但对我这种手速一般的玩家比较友好。
Right now I stack survival components first (HP, damage reduction) before layering on offense-oriented ones — most of the times I've gotten stuck, it's from getting one-shot, not from lacking damage. Once survival feels solid, I switch to a more aggressive high-value build to chase burst damage. This ordering isn't necessarily optimal, but it's forgiving for a player with average reflexes like me.
还没想明白的地方
What I Haven't Figured Out Yet
10 托盘全部解锁之后要怎么分配,我还没有一个稳定的结论——目前是走到哪配到哪, 遇到打不过的 BOSS 就临时调整。等我把这块想清楚了会回来更新这一页 (对,就是首页那个"持续施工中")。
I don't have a stable answer yet for how to allocate once all 10 tray slots are unlocked — right now I just adjust on the fly, tweaking whenever a boss proves too tough. I'll come back and update this page once I've worked it out (yes, the "perpetually under construction" banner on the home page is about this).
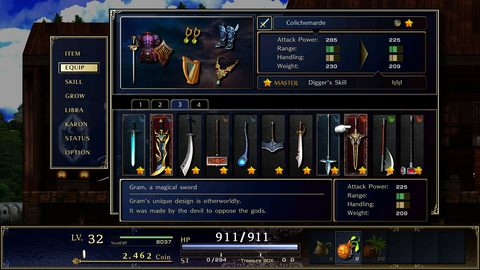
(截图版权归原厂商所有,取自 Steam 商店页面的官方截图,仅作非商业性攻略展示之用。)
(Screenshot belongs to the game's publisher — official Steam store material, used here for non-commercial fan-guide purposes only.)
相关讨论方向参考自 游民星空攻略专题 里"天平搭配"相关的条目分类,具体数值没有照抄,是我按自己打法调整过的。
The discussion directions above are informed by the "build" section of Gamersky's strategy hub; the specific numbers aren't copied verbatim, they're adjusted to match my own playstyle.