Week 2: Twenty minutes or ninety
Why nap length is not a preference — sleep inertia, and the dead zone between the two lengths that work
1 March 2027
There are two good naps and a large bad one between them. This lecture is about where that gap comes from, and it is the one the rest of the course keeps referring back to.
Outline#
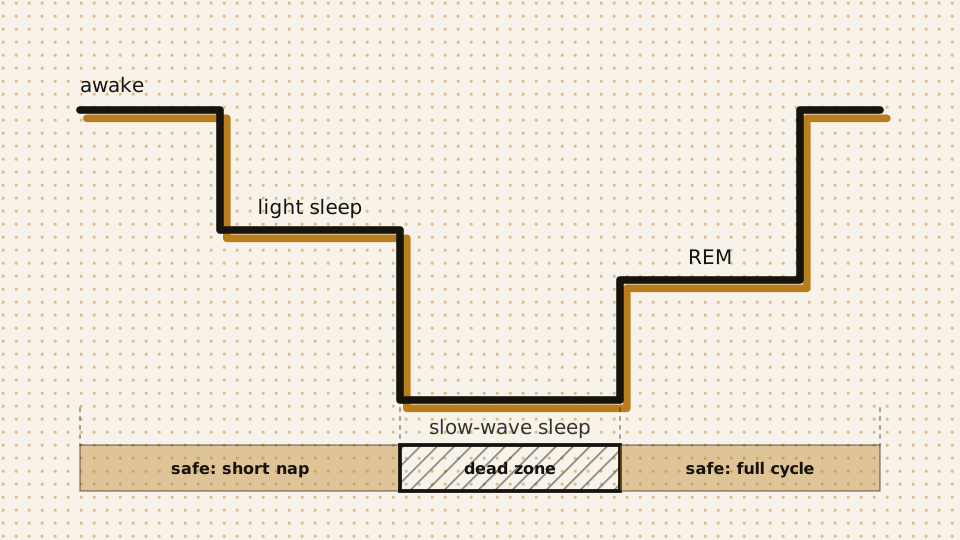
- Where week 1 left off. The cycle runs roughly ninety minutes: light sleep, then slow-wave sleep, then REM. A nap is not a small night’s sleep — it is an entry into that sequence, and where you stop it decides what you get.
- The short nap. Stopped before slow-wave sleep begins. Alertness recovers, and almost nothing has to be undone on waking.
- Sleep inertia. The grogginess on waking out of slow-wave sleep. It is measurable, it can cost more than the nap returned, and it is the reason nap advice sounds superstitious when it is closer to arithmetic.
- The dead zone. Long enough to reach slow-wave sleep, too short to leave it the gentle way. This is the nap most people have tried once, concluded they are “not a nap person” from, and never repeated.
- The full cycle. Ninety minutes comes back up through lighter sleep before waking, which is why it can cost less than sixty.
The claim to argue with#
Nap length is not a matter of preference, and someone who says naps don’t work for them is usually reporting the dead zone.
Bring the strongest objection you have to that. The Nap Lab this week is built on it.
Before next week#
Try both lengths — 20 minutes and ninety — and notice the first five minutes after each. Week 3 is about the one intervention that moves these numbers, so arrive knowing what they feel like on you rather than in a study.
Teaching team
- Idris Fenn — tutor