Factorio: Engineering Addiction
Week 1 — Early-Game Foundations
Before you touch a belt
Read the map first. Rock formations (“big rocks”) aren’t ore — hand-mining one gives free stone, and sometimes coal, in a couple of swings. That’s faster than waiting on a drill for the stone your first furnaces need, and it can hand you enough coal to bootstrap the loop on the next slide.
- big rocks: free stone, occasional coal, no drill required
- ore patches (iron, copper, coal) are what you put drills on
- nothing here needs automation yet
Mining rates
Every drill’s output is fixed by two numbers: its mining speed and the ore’s own mining time. Production rate is mining speed ÷ mining time — a faster drill or a softer ore both raise it.
- burner mining drill: 0.25 mining speed, 150 kW burned as fuel (not drawn from the grid), 2×2 footprint, 12 pollution/min
- electric mining drill: 0.5 mining speed — twice the burner drill — 90 kW from the grid, 3×3 footprint with 5×5 resource coverage, 10 pollution/min
Mining rates, continued
- ore patches are finite: every successful mining action has a 100% chance to remove one unit from the patch, so a patch’s size is also its lifespan, not just its yield
- hand-mining follows the same shape — (1 + mining speed bonus) × 0.5 ÷ mining time — it’s slower than a drill, but never automation-gated
Mining rates, in practice
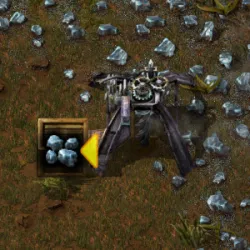
Source: Factorio Wiki, CC BY-NC-SA 3.0.
Same drop-straight-into-whatever’s-there mechanic the next two slides use — a chest here, a drill’s fuel tank or a furnace next.
Hand-mining, in practice

Source: Factorio Wiki, CC BY-NC-SA 3.0.
This bar is the hand-mining formula from last slide made visible — mining speed bonuses (from research or equipment) are what speed it up.
Burner chains
A mining drill deposits its output directly into whatever’s immediately in front of it — a chest, a furnace, or another burner-fuelled entity, including a second burner mining drill.
Put two burner mining drills on a coal patch facing each other, one tile apart: each one’s output lands straight in the other’s fuel tank. Prime both by hand and the loop is self-sustaining — no inserter, no belt, no power pole.
- fuel stacks climb past what either drill needs — that surplus is your coal stockpile, ctrl-click either drill to collect it
- don’t add a burner inserter to “skim” the surplus — it pulls from the same fuel stack the drill runs on and can drain it faster than mining refills it, stalling the loop
Burner chains, in practice
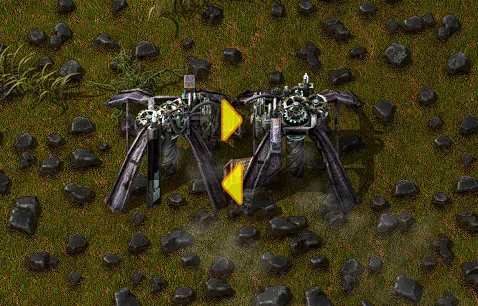
Source: Factorio Wiki, CC BY-NC-SA 3.0.
Coal just happens to also be valid fuel for what it’s dropped into — the next slide uses the same drop-into-whatever’s-in-front mechanic for ore.
Direct burner-to-furnace
Same mechanic, aimed at a furnace instead of another drill: place a stone furnace directly in front of a burner mining drill’s output and the drill deposits ore straight into it. No belt, no inserter, no wasted tile.
- only the one furnace directly in front of the drill’s output gets fed this way — everything else still needs a belt or inserter
- the drill and the furnace each still burn their own coal — hand-feed both
- pairs naturally with a burner-chain coal loop nearby: mine the coal by hand from the loop, carry it to the drill and furnace
Direct burner-to-furnace, in practice
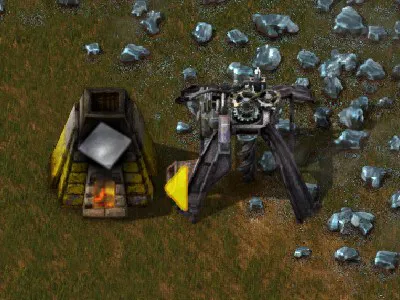
Source: Factorio Wiki, CC BY-NC-SA 3.0.
Combine this with the furnace-row idea below once you outgrow one drill, one furnace.
The ore-to-furnace ratio
One mining drill feeds a fixed number of furnaces before the belt runs empty. Furnace rows beat scattered furnaces, because every furnace in a row is in inserter reach of the same ore and coal belts.
- every furnace holds three internal item stacks: fuel, input (ore) and output (plates). Stone and steel furnaces have all three; the electric furnace has no fuel stack at all, since it draws power instead of burning coal
- that’s why an electric furnace only needs two belt connections (ore in, plates out) where a burner furnace needs three (ore, coal, plates)
Stone furnace now. Steel furnace once you have the steel to spare — faster smelt time, same footprint.
Furnaces, in practice
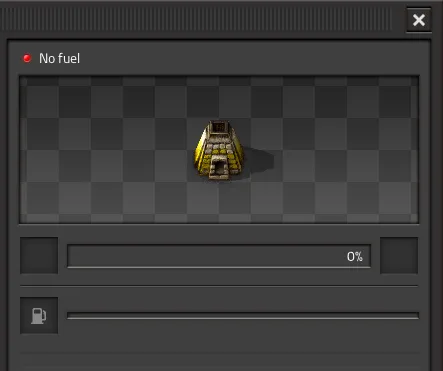
Source: Factorio Wiki, CC BY-NC-SA 3.0.
An idle furnace with visible ore in it almost always means an empty fuel stack, not an empty input — check fuel first.
Boiler and steam power
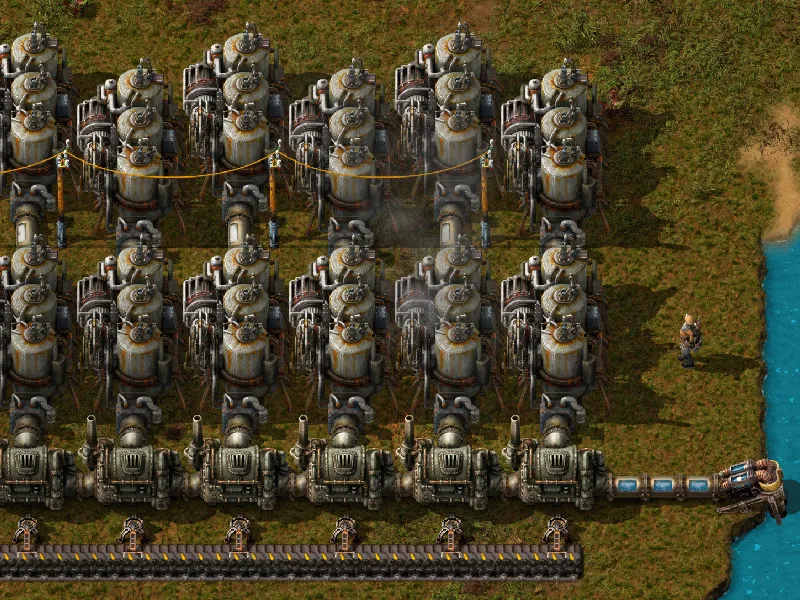
Actual electricity starts with three parts in a line: an offshore pump, a boiler, and a steam engine.
- offshore pump draws water, piped into the boiler
- boiler burns coal to turn that water into steam
- steam engine converts steam into power for the grid
- one boiler comfortably keeps two steam engines fed — build in that pair, not one-for-one
- that ratio scales directly: one offshore pump supplies enough water for 20 boilers and 40 steam engines — the same 1:2 pair, sized up for a whole base instead of a first taste of power
Boiler and steam power, in practice
Source: Factorio Wiki, CC BY-NC-SA 3.0.
Get this running before your first burner chain runs out of patience — it’s what everything from Week 2 onward is built on top of.
Research costs something concrete
A technology’s cost is a fixed count of science packs, consumed once enough lab time has processed them — nothing about early research is free just because no assembler is running yet.
- Automation costs 10 automation science packs — craftable by hand or by a hand-fed assembler this early — and isn’t affected by the game’s tech-price-multiplier setting the way later techs are
- Automation unlocks Assembling Machine 1 and the long-handed inserter — the two entities every following week assumes you already have
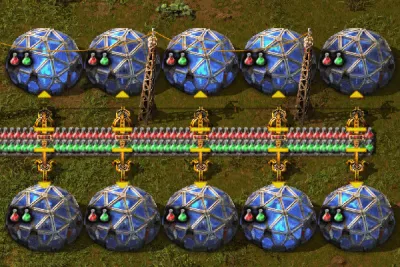
- a lab draws 60 kW, occupies a 3×3 footprint, and processes packs at a base speed multiplier of 1 — before any research-speed bonus exists, more labs working the same technology is the only way to go faster
The research-time formula
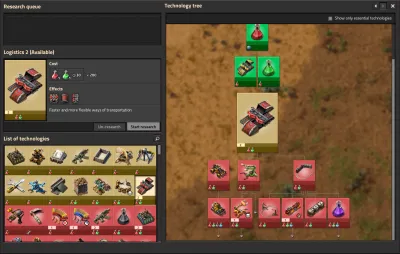
Research time follows one formula: T = (T0 × P) ÷ (L × S) — per-unit time, times price in packs, divided by labs times lab speed. Every research-speed upgrade later in the game is really just raising L or S in this same equation.
- only one technology is actively researched per force at a time — queuing several doesn’t parallelise them, it just orders which one starts next
- the research queue itself has been on by default for new games since version 1.1.92 — queue Automation now and whatever’s next starts the moment the packs are in, with no need to babysit the switch
Research, in practice
Source: Factorio Wiki, CC BY-NC-SA 3.0.
Everything on this tree costs a specific number of specific packs — there is no separate, vaguer “research points” currency underneath it.
Labs, in practice
Source: Factorio Wiki, CC BY-NC-SA 3.0.
This is L in the research-time formula made physical — five labs here divide the same research time by five, not by one.
Automation before almost everything else.
Research priority in one sentence. A couple of early logistics or efficiency techs are worth taking first — nothing else is.
Hand-fed, on purpose
Your inventory is a temporary buffer between “gathered” and “used,” not a production line.
- craft ammo and a handful of assemblers by hand while the base is small
- everything else waits for a proper line
- knowing which is which is the actual skill this week teaches
What hand-crafting can’t do
Hand-crafting covers most early recipes, but not all of them — knowing the exceptions now saves a confused trip to the wiki later.
- ores can only be smelted in a furnace, never crafted by hand
- any recipe with a fluid ingredient needs a machine — no fluids in a hand-craft, ever
- engine units specifically must be built in an assembling machine, even though every one of their ingredients is solid
- left click queues one, right click queues five, shift-click queues as many as your inventory can support — cancelling a queued craft fully refunds whatever was spent on it
Hand-crafting, in practice
Source: Factorio Wiki, CC BY-NC-SA 3.0.
Queuing a craft that needs an intermediate you don’t have queues the intermediate first, automatically — the one place a player can chain-craft like this. Assembling machines never do it for you.
Hand-fed assembling machines
An Assembling Machine 1 is available from the start — no research needed. It costs 9 iron plates, 5 iron gear wheels, and 3 electronic circuits to build, and needs electricity to run.
- crafting speed is 0.5 — slower per item than hand-crafting at speed 1.0
- no fluid input at this tier — a fluid ingredient waits for Assembling Machine 2
- the payoff isn’t speed: feed it by hand, then walk away — it keeps working while hand-crafting ties you up for every item
- worth a steady trickle of anything before belts and inserters exist to automate the feed
Hand-fed assembling machines, in practice
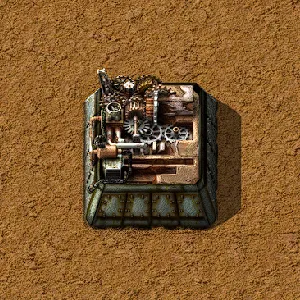
Source: Factorio Wiki, CC BY-NC-SA 3.0.
Automating the feed — belts and inserters into this same machine — is where Week 2 begins.
This week’s practical
Goal: research Automation
Using: hand mining, manual smelting, starter power
Not using: belts or assemblers beyond what Automation unlocks
Bring the save you finish this tutorial with to Week 2 — base design starts from wherever you leave it.